You may have some Customers you want to treat like VIPs or Inventory Products you need to discount. KLĒR lets you set up custom discounts for specific customers and products.
To create a discount, follow the steps below:
- Step 1 - From the Retail module in the Navigation pane, select the Discounts section and click the New button and a pop-up window will appear.
- Step 2 - Start by entering information regarding who and what the discount will apply to and how employees will recognize and activate the discount.
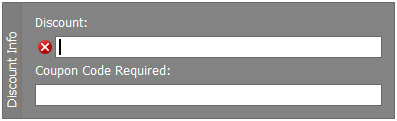
- Discount - Give your discount a name you'll recognize later.
- Coupon Code Required - Enter a memorable code if you want employees to use one to activate the sale.

- Coupon Code Required - Enter a memorable code if you want employees to use one to activate the sale.
- Category Group/Main Category/Subcategory - Select the categories you want to apply the discount to. If no category is selected, the discount will be applied to all products in the inventory or the products you choose to link.
- All Products & All Inventory Packages - Check if the discount will apply for all items within the chosen categories. These boxes begin checked when creating a new discount, once you link an individual product to the discount these boxes will adjust. If you link a product, All Products becomes unchecked. If you link a lot, All Inventory Lots becomes unchecked.
- All Products & All Inventory Packages - Check if the discount will apply for all items within the chosen categories. These boxes begin checked when creating a new discount, once you link an individual product to the discount these boxes will adjust. If you link a product, All Products becomes unchecked. If you link a lot, All Inventory Lots becomes unchecked.
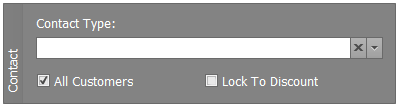
- Contact Type - Use the drop-down if the discount is to be applied to a specific contact type.
- All Customers - Check if the discount is to be applied to all customers within the chosen Contact Type. If an individual customer is linked to this discount, All Customers becomes unchecked.
- Lock to Discount - Check if the customer eligible will be locked-in to this discount ONLY.
- Discount - Give your discount a name you'll recognize later.


- Step 3 - Next add the dates and times the discount will be scheduled.
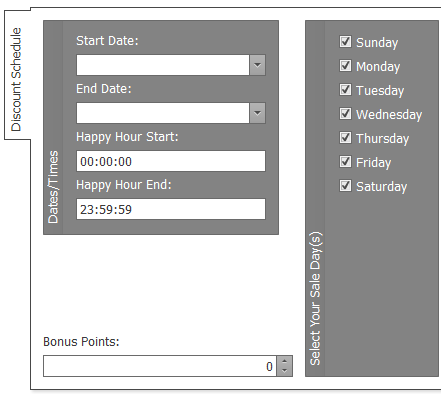
- Start Date - If the discount is set to start on a specific date, enter that date in this field.
- End Date - If the discount is set to end on a specific date, enter that date in this field.
- Happy Hour Start - If the discount is set to start at a specific time, enter that time in this field.
- Happy Hour End - If the discount is set to end at a specific time, enter that date in this field.
- Select Your Sale Day(s) - If the discount is for specific days of the week, select those days from the list.
- Bonus Points - If there is a rewards program set up, you can award Bonus Points for specific purchases as a discount.

- Step 4 - Next add how the discount will be applied to the products or overall sale.
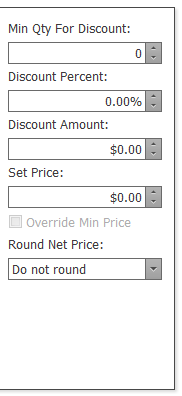
- Min Qty For Discount - Enter an amount if there is a minimum quantity needed to be purchased for this discount to be activated.
- Discount Percent - If the sale is a percentage off each item, enter that percentage as the Discount Percent.
- Discount Amount - If the sale is a dollar amount off each item, enter that amount as the Discount Amount.
- Set Price - If the sale is to set the inventory to a specific price, enter that price as the Set Price. This is a great way to discount multiple products or lots to the same price without having to change each Discounted Price within each individual item.
- Override Min Price - If the employees need to be able to assign the discount even if the minimum price is not met, click this box.
- Round Net Price - When a percentage is taken off, you can set the price to round in a specific direction. You can choose Do not round, Round up to dollar, Round down to dollar, Round to dollar, or Round to half dollar.

- Step 5 - You are now able to link the discount to customers, products and lots. To link a discount to a specific customer, product, or lot refer to the Assigning Discounts article. To link a discount to multiple products or lots, under the corresponding sub-tab click the Link button and choose the products or lots you would like this discount to apply. If the product is not yet created, you can add a new product from this screen by clicking New and following the directions in the Adding an Inventory Product article.


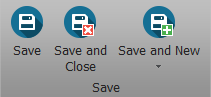
- Step 6 - Click one of the Save options.