Users have the ability to create Retail Customers in KLĒR. Creation of these retail customers results in the ability to assign Discounts to them and generate a Retail Order on their behalf. This means that until the retail customer has been created, you can't sell to them!
To add a Retail Customer, follow the steps below:
- Step 1 - In the Retail module select Customers from the navigation pane and then click the New button. This will open a new tab where you can add your new customer. Be sure Retail Customer is selected from the top navigation bar.


- Step 2 - Begin by filling out the data in the Customer Information section. Red fields are required and yellow fields are optional:

- Nickname - an alternate name the customer would like to be used when purchasing
- First Name - the customer's first name
- Last Name - the customer's last name
- Date Of Birth - the customer's date of birth
- Marijuana ID - the unique ID number on the marijuana card (this can be scanned from the marijuana card)
- Marijuana ID Expiration - the expiration date printed on the marijuana card
- Date Created - this field will auto-populate with the date you first created the record and cannot be edited
- Contact Type - set this field to the type of customer you are creating to be used later when filtering customers and setting discounts (additional contact types can be added by contacting your KLĒR Specialist)
- Source - select how the customer heard about or found your location (you can also choose to add a new marketing source)
- Patient ID - the printed ID number on the customer's secondary form of identification
- ID Type - select the type of secondary form of identification being used or add a new type of identification


- Step 3 - Continue by filling in the Customers Address/Phone/Email.
- Address - the customer's address with street, city, state and ZIP
- Do Not Market Address - check this box if the Customer does not want to receive marketing materials at this address
- Phone - the customer's main and secondary phone number
- Do Not Text - check this box if the Customer does not want to receive messages at this number
- Email - the customer's email address
- Do Not Email - check this box if the Customer does not want to receive emails from your location
- Address - the customer's address with street, city, state and ZIP
- Step 4 - If the customer has a discount assigned to them, such as a veteran or agent discount you can assign it when creating the customer.

- Discount - choose from a list of previously created discounts that can be associated to this customer (discounts may also be assigned by contact type, so ensure your customer has been marked appropriately)
- Discount Expiration - if there is an expiration date to the customer's discount, enter the date
- Step 5 - Additional important information about each customer can be found in the tabs under discount.
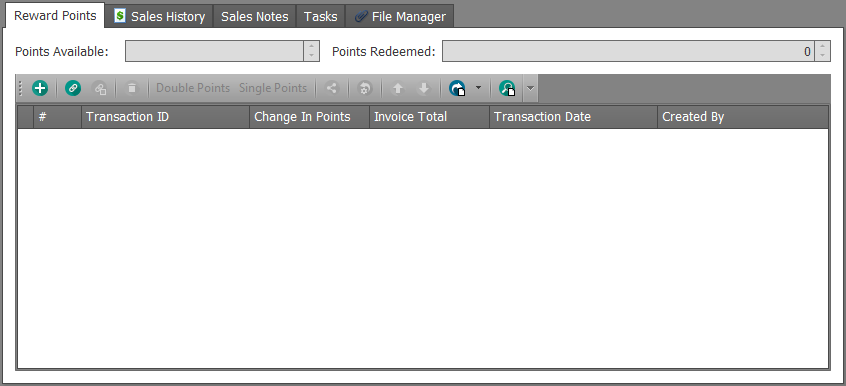
- Reward Points - can be set up to let your customer's know you appreciate their repeated business
- Points Available - if your location has a customer points reward system, the customers points will record here as they accumulate
- Points Redeemed - the points the customer has used will be totaled and populate in this field
- Sales History - once the retail customer has purchased items, each purchase case be viewed individually by clicking the corresponding record
- Sales Notes - created at any time to record special needs, future wants, or other considerations for that customer
- Tasks - assigned to employees regarding the retail customer, such as calling the customer that a product they requested has arrived
- Files Manager - upload files related to that Customer, such as a copy of their ID or other required documents


- Step 6 - Choose one of the Save options.

Great job! You've created a new Customer and can now sell them your products!