Inventory Products are purchased from Vendors using Production Orders, and then either sold directly to customers or used in Production Orders to make new Inventory Products. The quantities of your Inventory Products are increased through growing plants or creating/receiving Purchase Orders. However, you can't order a particular Inventory Product until that Inventory Product has been created in KLĒR as a purchasable item. This article will walk you through how to add a brand-new Inventory Product to KLĒR so you can start growing or purchasing it!
To add an Inventory Product, follow the steps below:
- Step 1 - From the Inventory Module, select the Inventory Products section and click New to start adding the details of your new Inventory Product.
- Step 2 - Now, the fun part of adding all the details for your new Inventory Product so that KLĒR handles it properly throughout all parts of the system. Begin by filling in the following fields in the Product detail window.

- Product Number - This number is manually selected to help you identify your Inventory Product. You can choose any number or letter combination you desire, and it does not need to be unique to the product.
- Product Name - The name you want your new Inventory Product to have throughout the system. This name must be unique to this Inventory Product.
- Active Product - Check this box when you're ready to use this Inventory Product in active Purchase Orders, Production Orders, and Sales.
- Product Qty - This field is auto-populated, based on product being added through purchase and production orders and the weekly inventory check performed by your team. Do not enter a quantity when first setting up your new Inventory Product. When you first implement KLĒR, your KLĒR representative will help set your initial inventory values properly.

- Step 3 - Next enter the information for the Product Description.
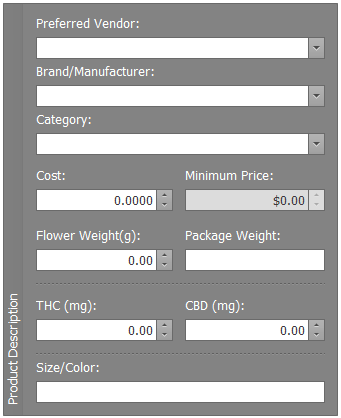
- Preferred Vendor - If there is a Vendor you'd prefer to purchase this Inventory Product from, enter the Vendor in this field. This will trigger other automated actions when purchasing the Inventory Product to make the process smoother. This field is optional, but when used will enhance your KLĒR experience.
- Brand/Manufacturer - This field helps to identify the Inventory Product with greater specificity. The Manufacturer and Vendor are often the same, but not always. This is an optional field.
- Category - Select the category that makes the most sense for the new Inventory Product you are creating or create a new category. Refer to the article on Setting up Categories.
- Cost - Enter the total cost to purchase this Inventory Product.
- Minimum Price -The lowest price the product is able to be sold for.
- Flower Weight - This weight is only the flower used in the product. Ensure this amount is entered as grams.
- Package Weight - This value is required by some states, to go on the label of a final product. This weight is the total weight of the final product, including packaging. If this Inventory Product is not the final product to be sold to customers, leave it blank.
- THC - If the amount of THC is known from tested lab results, it can be entered here. Make sure this amount is entered as milligrams.
- CBD - If the amount of CBD is known from tested lab results, it can be entered here. Make sure this amount is entered as milligrams.
- Size/Color - This text field gets printed on packaging and labels. You can type whatever you want to help identify the product in the system (ex: 10x10, Blue, Peach Rings).


- Step 4 - You can assign a Production Template to the new product and upload an image of the product. Uploaded images help budtenders locate products and will integrate with digital signage. Contact your KLĒR Specialist to learn how to integrate with online menus and ordering.
- Step 5 - Next, set the Pricing of your new Inventory Product.
Pricing for an Inventory Product adjusts based on the type of item and packaging.
Choose how you would like your inventory to Round Net Price. You can choose not to round, to round down or up to the nearest dollar, to round to dollar, or to round to half dollar.

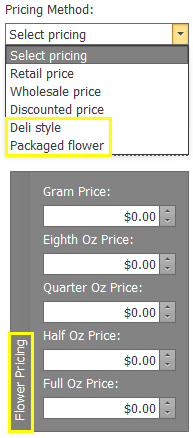
Pricing Flower
When pricing flower, if the budtender will be weighing the flower in front of the customer, choose Deli style; however, if the budtender will be pulling from prepackaged flower, choose Packaged flower. Typical flower pricing is set using a tiered or level system. In this system, your inventory products will be the tiers corresponding with set prices. When new flower is purchased, an Inventory Package will be created for each strain designated at that tier.
Example: You create an Inventory Product named Tier 1 Flower, where you set your pricing for all of your best flower. When flower is purchased, it is brought into Weedware as an Inventory Package based on the strain type. Strains (inventory packages) can be moved between tiers when pricing changes, usually as the product ages.
- Choose Deli style or Packaged flower from the Pricing Method drop-down. Once clicking in another field, the options for entering a retail and wholesale price will no longer be available.
- The Flower Pricing is located below the Pricing section. This is where you enter the prices set for that tier at each of the typical weights.
Pricing Non-Flower Items
Inventory products that are not flower related can be set to have both a Retail Price and a Wholesale Price.
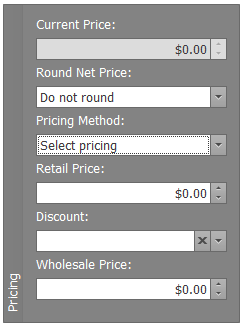
- Before choosing a Pricing Method from the drop-down, enter the prices of the Inventory Product when sold at Retail Price and Wholesale Price.
- Choose from the Pricing Method drop-down how you currently want the product to be priced. If you choose Retail price, you will no longer see Wholesale price and visa versa. This does not mean the price is no longer available, but that it is not currently being used. If you need to change the price, you can do so at any time by editing the Inventory Product.
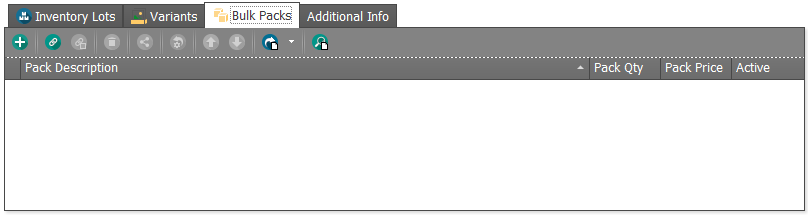
- Step 6 - If your location has set up their online identification system, you can set your Variants for product identification. If you would like to set this up, contact your KLĒR specialist! Bulk packs is a way to set up wholesale packages. KLĒR does offer a Wholesale Module. If you have purchased this module, set up your wholesale orders in the wholesale module. If you have not seen the Wholesale Module, contact your KLĒR specialist to schedule a demo.


- Step 7 - Finally, set up any important additional information regarding your product. These fields are option, but will enhance the KLĒR experience when tracking products and their sales.
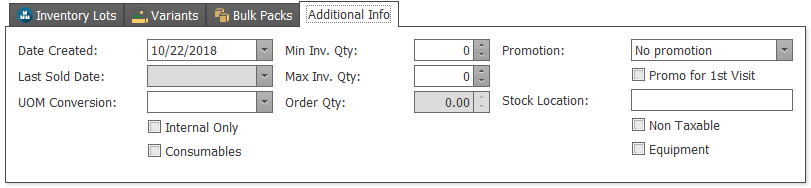
- Date Created - A creation date can be set for the product, but each Package will also have a date attached when products are brought in through production and purchase orders.
- Last Sold Date - This can be useful if a product is not selling. KLĒR will auto-populate this field each time an inventory count is conducted.
- UOM Conversion - A conversion is used if a product will be brought in as one quantity, but sold as another. Example: A 50 gallon bag of soil is purchased, but used one gallon at a time when clones are taken. A conversion of 1-bag to 50-gallons could be created to break up the product.
- Internal Only & Consumables - Mark these check-boxes if the product will be used by employees or consumed/used by employees.
- Min Inv. Qty - If there is a minimum amount you want the system to set the product to needing reorder, enter that amount here.
- Max Inv. Qty - If there is a maximum set that amount here. The maximum is also set to determine how many to order when products run low.
- Order Qty - This field will Auto-populate based on the Min and Max Inv. Qty amounts that have been set. When the Inventory Quantity falls below the minimum amount, KLĒR will tell you how items need to be ordered to meet the Max Inv. Qty.
- Promotion - If the product is promotional, set the reason here or add a new reason. This is informational for your budtenders.
- Promo for 1st Visit - If this product is use for a first-time special, check this box. This is informational for your budtenders.
- Stock Location - If your site tracks products based on stock location, enter that location in this field.
- Non Taxable & Equipment - Mark these check-boxes if the product is non-taxable or used as equipment only.

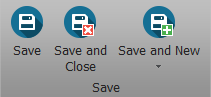
- Step 8 - Click one of the Save options.

You've creating a new Inventory Product, capable of being used in Sales, Purchase Orders, and Production Orders across the system. Each time that you complete a Purchase or Production Order for the product, a new Inventory Package is created. These lots are subsets of the entire Inventory Product and will be listed below the Inventory Package tab. If you would like to view all of the Inventory Packages for a specific Inventory Product, make sure you have the correct Inventory Package selected from the drop-down menu.