 A production order needs to be created anytime you need to turn one type of inventory product into another. Creating this production order turns the original inventory product into a new inventory product. This new inventory product can then be sold to customers or used as the input for another production order such as a dozen cookies or "starter kit" containing multiple items. Remember, if you need to turn one inventory product into another, create a Production Order.
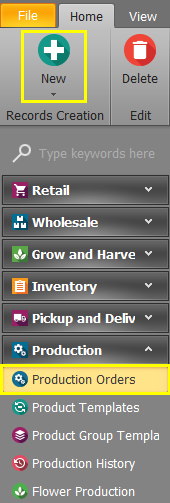
To add a production order, follow the steps below:
- Step 1 - In the Production module select Production Orders from the navigation pane and then click the New button. This will open a new tab where you can add your production order.
- Step 2 - In the Production Status field, set the status to "Complete" if you will be completing this Production Order immediately. If you are planning to schedule the Production Order for later and are setting up the information ahead of time, select the "Scheduled" status. A status of "Scheduled" will allow you or your team to select and complete this Production Order at a later time.


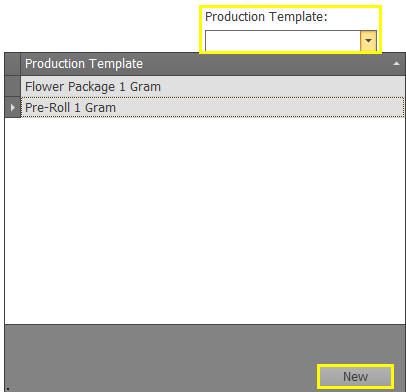
- Step 3 - If the Production Order will be replicated often, a new production template can be created to easily reproduce the same order. If the a production template has already been created, choose it from the Production Templates.

- Step 4 - If the Production Order has a specific Package, Strain, or Product that will be relevant for all raw materials or produced products, defaults can be set that will automatically apply to those fields. For example, setting a default strain will ensure each product that is produced is marked as that strain type.
- Step 5 - Now it's time to start converting Inventory Products into something new!
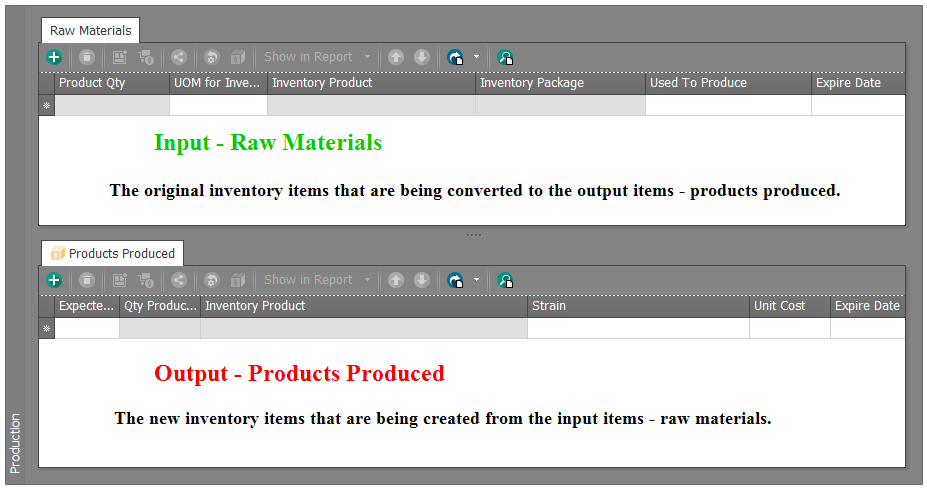

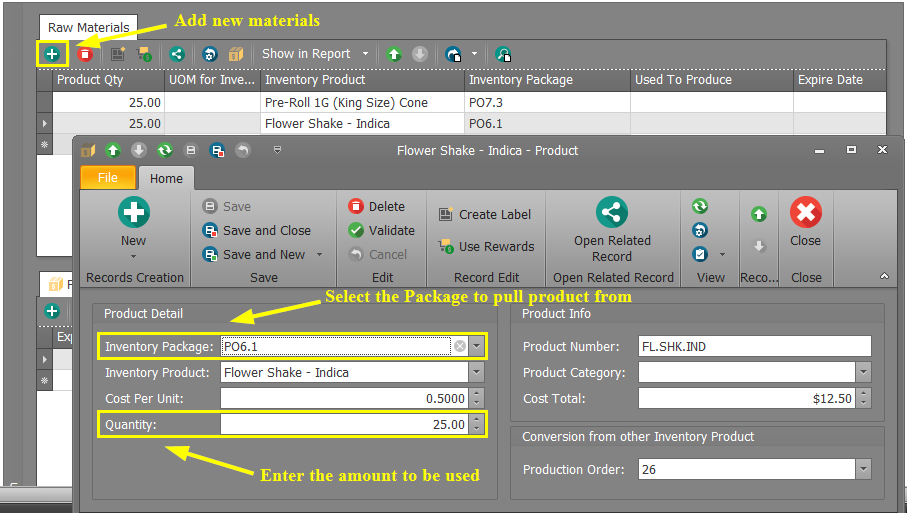
- Step 6 - Under Raw Materials add the materials/products used when creating the new product. Add a new material by clicking the plus button and selecting the Inventory Package materials will be pulled from to ensure inventory is adjusted correctly. Enter the Quantity to be used in the production order. All other fields will auto-populate based on the Inventory Package and Quantity entered.

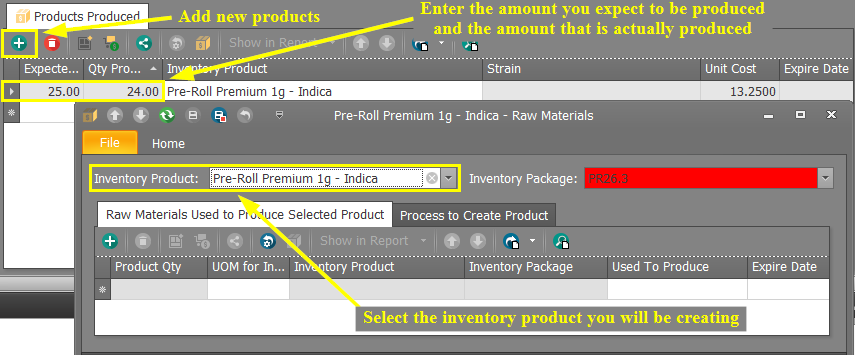
- Step 7 - Now it's time to add your Products Produced. Click the plus button and choose the Inventory Product that will be produced in the Production Order. If the Inventory Product does not yet exist, you can create the new Inventory Product. Once saved, an Inventory Package number will be automatically assigned to the Inventory Product linked to the specific Production Order. Save the pop-up window and enter the Expected Qty and Qty Produced. Expected Qty is the quantity that should be produced based on the Raw Materials. Qty Produced is the quantity that is actually produced.


- Step 8 - If the Expected Qty and Qty Produced do not match, a Rejected Quantity will appear in the Rejected tab. This is where any loss within the production process is verified. Enter a short explanation of the loss in the Reason Rejected field.
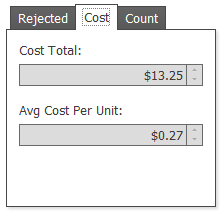
- Step 9 - Cost analysis is one important piece of determining whether produced products are priced correctly. Easily view the Cost Total and Average Cost Per Unit in the Cost tab.

- Step 10 - To verify production totals, click the Count tab.
- Original Package Qty: The amount of flower material used from the chosen package in raw materials.
- Ending Package Qty: The amount of flower material that will be deducted from the chosen package in raw materials.
- Quantity Produced: The amount of products produced when the Production Order is completed.
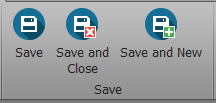
- Step 11 - Choose one of the Save options to save your Production Order.

You have successfully converted one or more products into new products using a Production Order. Don't forget to change the order to completed when you or your employee has finished filling the order.