In order to make sure Inventory records are accurate, your team is likely performing periodic inventory counts. These counts are conducted on each Inventory Package. You can use KLĒR to manage and document Package counts. If your location has removable scanners available, the most efficient way to to conduct a count is allowing employees to scan items. Refer to the Conduct an Inventory Count with Scanners article.
To conduct a package count manually, without scanners, follow the steps below:
- Step 1 - From the Inventory module, select the Package Count section and click the New button. This will open a new Package Count detail window.
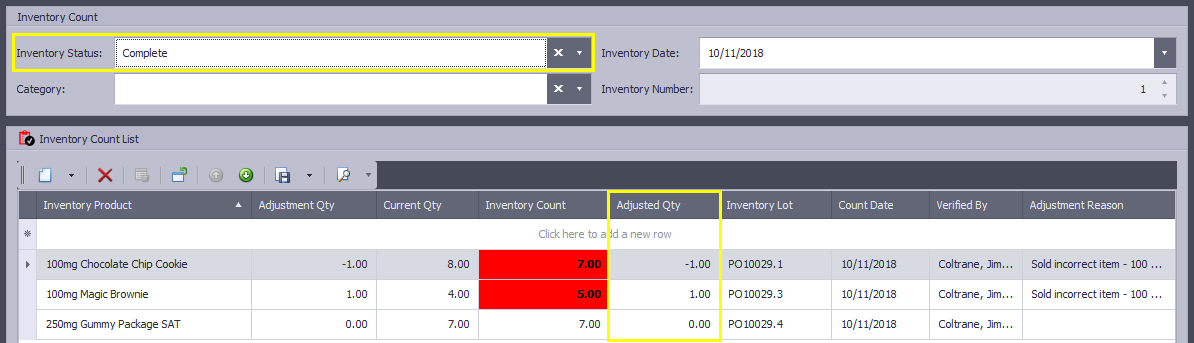
- Step 2 -The Inventory Status field is automatically set to "In Process." From the Category drop-down menu, choose the categories you would like to include in the inventory count. This will auto-populate all products in the selected categories to your Inventory Count List once you save the Package Count. The Inventory Number will also auto-populate the first time you save.


- Step 3 - If a remote device is not available, you will need to print the report for counting purposes. As you count or after the count is complete, enter your counted amounts in the Inventory Count field. If a product did not appear on your Inventory Count List, you can use the add new button to manually search the entire inventory for the product. When a products Inventory Count does not match the expected Current Qty, the amount will be shown highlighted in red.


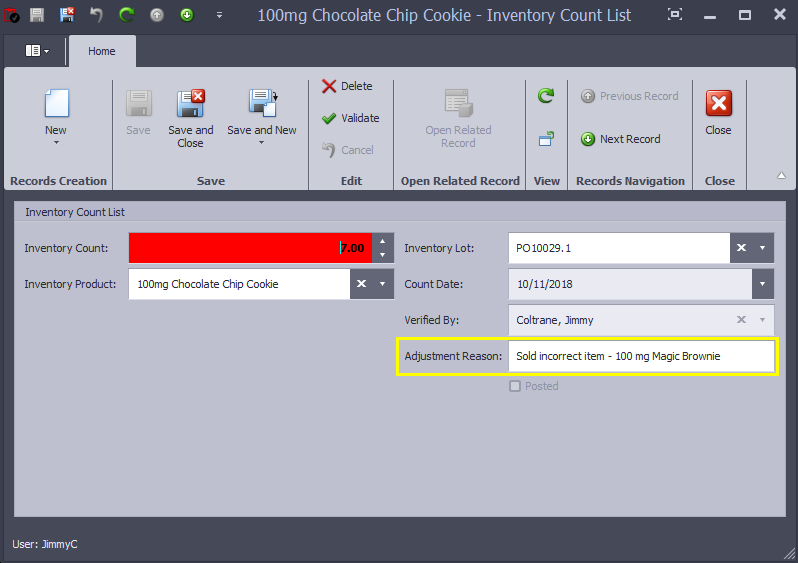
- Step 4 - Once all products are scanned or added to the Inventory Count List, the Adjustment Qty field will show the amount of missing or extra product. These products will need to adjustment and reason for adjustment.


- Step 5 - Your Inventory Count can only be complete if all of your Inventory Products have been accounted for or an Adjustment Reason has been entered. To enter an adjustment reason, click the product needing to be adjusted and a pop-up will appear to enter the Adjustment Reason.

- Step 6 - Once you have verified all discrepancies, mark the Inventory Status as Complete. The Adjusted Qty field will populate with the amount of adjustment made in the inventory for each product.

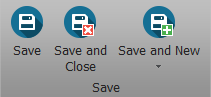
- Step 7 - Click one of the Save options.
You've now completed an inventory count of each package and reconciled the inventory!