Grow Inspections are used to document regular, ongoing inspections of Grow Batches or individual Plants, including identifying pests, overall health, and amount of growth. This article gives an overview of how to document a Grow Inspection.
Inspecting a Grow Batch
To begin logging a new Grow Batch Inspection, follow the steps below:
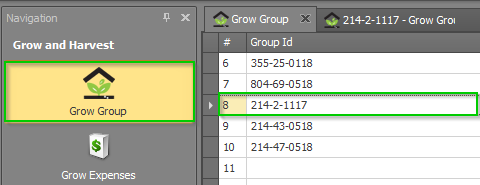
- Step 1 - From the Grow and Harvest Module, select the Grow Batch section and double click the Batch you are inspecting.
- Step 2 - Select the Grow Inspection subtab in the chosen Grow Batch and click New. A new tab will appear to input inspection information.
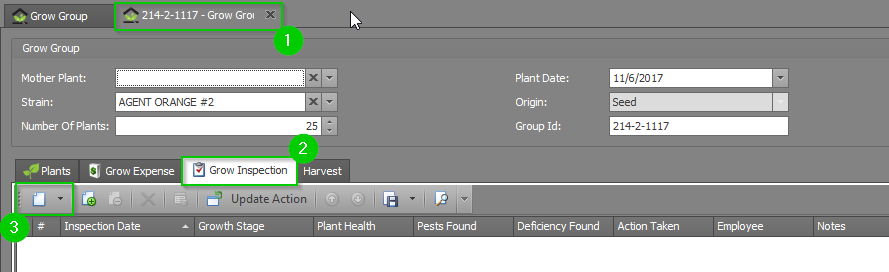
- Step 3 - Fill out each of the following fields with details from the inspection:
- Growth Stage - Custom-defined stages that denote the specific stage the Plant is in during the inspection. New Growth Stages can be added by your organization's Administrator at any time.
- Plant Health - Custom-defined statuses that denote the current health of the Plant(s) being inspected. New Plant Health statuses can be added by your organization's Administrator at any time.
- Pests Found - Custom-defined options for identifying pests found on the Plant(s) being inspected. New pests can be added by your organization's Administrator at any time.
- Deficiency Found - Custom-defined options for identifying deficiencies found on the Plant(s) being inspected. New deficiencies can be added by your organization's Administrator at any time.
- Action Taken - Custom-defined options for reporting any action taken by the inspecting team member to resolve problems found during an inspection. New options for actions taken can be added by your organization's Administrator at any time.
- Inspection Date - The date of the inspection. This will auto-populate with the current date, but can be adjusted.
- Grow Batch - The grow Batch to which the plant(s) being inspected belong. This will auto-populate with the current Grow Batch, but can be adjusted.
- Employee - The employee conducting the inspection. This filed will auto-populate with the employee enter the inspection information, but can be adjusted.
- File Manager - As in all other parts of KLĒR THC, the File Manager field is used to upload related files for the action being taken. In this case, this would often be a photo of a specific pest or health problem being logged by the inspecting team member.
- Notes - An open text field for the inspecting team member to document exactly what he or she saw during the inspection.
- Step 4 - Click the Save or Save and Close button in the top navigation bar.


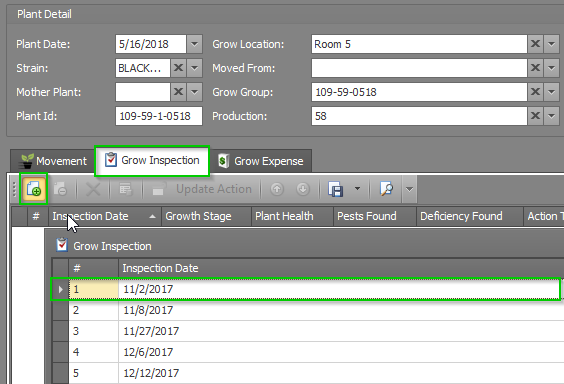
Inspecting a Plant
To begin logging a new Plant Inspection, follow the steps below:
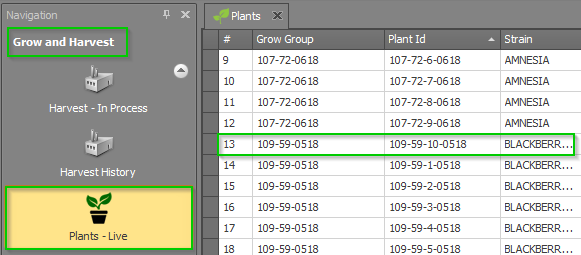
- Step 1 - From the Grow and Harvest Module, select the Plants-Live section and double click the plant you are inspecting. You can also use the find feature in the top ribbon to help locate the correct plant.

You can also double click on an individual Plant in the Grow Batch to view and edit the Plant detail window.
- Step 2 - Select the Grow Inspection sub-tab in the chosen Plant and click New.
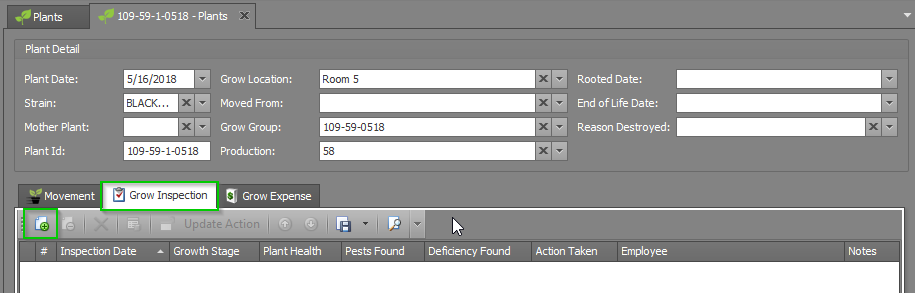
- Step 3 - A new tab will appear asking for the Inspection Date. Choose an already existing inspection or create a new inspection. This allows you to inspect multiple plants and assign them the same inspection results, even if they are not in the same Grow Batch.
- Step 4 - Click the Save or Save and Close button in the top navigation bar.


You've inspected your Plant or Grow Batch!
